Appium Concepts: Appium command-To Retrieve the “display density” of the Android device
.getDisplayDensity()

🎥 Check Out the Video Below for Complete Details!
Overview:
When we are working with mobile test automation using Appium, understanding the physical characteristics of a device screen can be essential, especially when dealing with coordinate-based interactions, custom gestures, or image-based automation.
One such characteristic is the display density, which can be retrieved using the .getDisplayDensity() method.
Lets discuss about “.getDisplayDensity()” method in detail
The .getDisplayDensity() method is used to retrieve the pixel density (DPI) of the display on an Android device. This value represents how many pixels per inch (DPI - dots per inch) are packed into the screen. The display density affects how content is scaled and rendered on the screen, and knowing it can help ensure consistent interaction with UI elements across devices with different screen densities.
Syntax:
driver.getDisplayDensity();Note that this method is supported in Android only and returns a number indicating the DPI value of the screen.
Typical Return Values
Depending on the device, .getDisplayDensity() might return values like:
120(ldpi - low density)160(mdpi - medium density)240(hdpi - high density)320(xhdpi - extra high density)480(xxhdpi - extra extra high density)640(xxxhdpi - extra extra extra high density)
Why is it useful?
Understanding screen density is critical when:
- Calculating accurate touch coordinates across multiple screen resolutions.
- Dealing with image-based testing, where density impacts how images scale.
- Creating custom swipe or drag gestures where pixel accuracy is necessary.
- Ensuring visual consistency across devices.
Example:
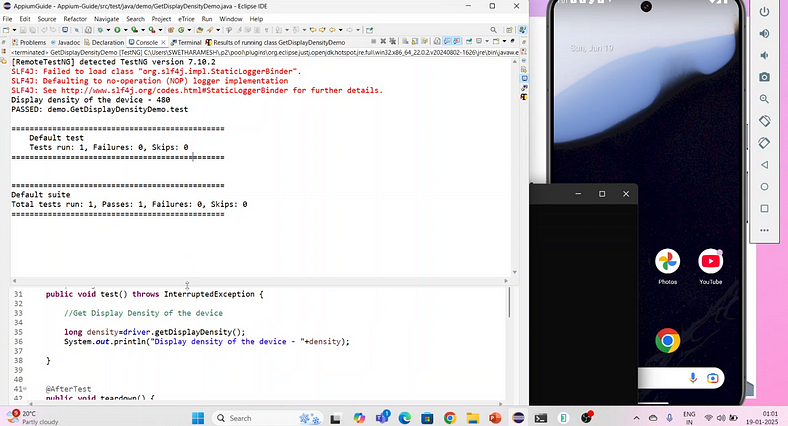
long density=driver.getDisplayDensity();
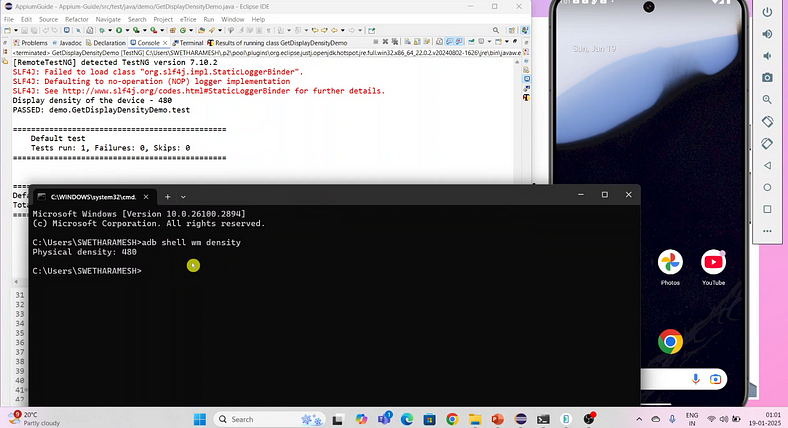
Will confirm the same by using adb command too

“Complete Code: Optimized and Ready to Use”:
package com.appiumguide.appiumconcepts;


import org.testng.annotations.AfterTest;
import org.testng.annotations.BeforeTest;
import org.testng.annotations.Test;

import io.appium.java_client.android.AndroidDriver;
import io.appium.java_client.android.options.UiAutomator2Options;
import java.net.*;
import java.time.Duration;

/**
 * Script Details - Appium Concepts | Appium command-To Retrieve the “display density” of the Android device
 *
 * appium-java-client version: 9.3.0
 *
 * @author 'Ramesh Kodumuru' for AppiumGuide [appiumguide@gmail.com]
 */

public class GetDisplayDensityDemo {

 private AndroidDriver driver;

 @BeforeTest
 public void setup() throws MalformedURLException {
  UiAutomator2Options cap=new UiAutomator2Options();
  cap.setPlatformName("android");
  cap.setAutomationName("uiautomator2");
  cap.setDeviceName("Pixel8Pro");


  driver = new AndroidDriver(new URL("http://127.0.0.1:4723"), cap);
  driver.manage().timeouts().implicitlyWait(Duration.ofSeconds(100));

 }

 @Test
 public void test() throws InterruptedException {

  //Get Display Density of the device

  long density=driver.getDisplayDensity();
  System.out.println("Display density of the device - "+density);

 }


 @AfterTest
 public void teardown() {

  if(driver!=null) {
   //driver.quit();
  }

 }

}
Conclusion:
The .getDisplayDensity() method is a small but powerful tool in the Appium API that helps testers write more adaptive and device-independent test scripts. Especially in scenarios where screen scaling, layout validation, or pixel-perfect interaction is required, this method proves invaluable.
Explore on GitHub:

No comments:
Post a Comment